Search This Blog

Pages

Showing posts with label swiss. Show all posts

Tuesday, March 15, 2011

Rösti

It has been one year since I started writing this blog.  It has been really great to share some of my favorite recipes with all of you.  I have enjoyed writing the recipes and photographing the food with hungry kids waiting to be fed.  It has been a great experience.  But... Of course there is a but... It takes a lot of effort to write and publish each post.  Sure, it doesn't have to be that way.  It is not how I would like to go on about it.  Not perfect probably but as better as it gets and it will continue like that.
Happy anniversary to Olives and Bread.  To celebrate, here is a recipe from Switzerland.  I know I had to write this super simple recipe for some friends and relatives.  This reminds me that there are still some people out there waiting for a Turkish version of this blog.  I am just waiting for the days that I will have time for that, so stay tuned.
Back to lovely rösti.   I ate this first time with my friend F at Zurich main train station.  There used to be a restaurant there with rösti specials.  It's unfortunate that it's now closed but they had a good variety of rösti dishes.  With cheese, with onions, with bacon, etc. I have learned how to make this from my mother-in-law and she does it with coconut butter most of the time.  It's very delicious like that and I definitely recommend it.  Usually it's made with butter or oil. Use whichever you prefer.   Rösti goes really well with cheese or meat, or any creamy meat dish, like Zurich Geschnetzeltes (cut meat Zurich style - recipe will be coming up soon). 

(Makes 4 portions as a side dish)

700-800 g potatoes (preferably fast cooking ones if you make it from raw potatoes - see below for reason)
butter or oil to cook
salt and pepper to taste

There are two ways of doing this.  You can either boil the potatoes with their skin. Then peel and make the rösti or you can do it from raw potatoes.  Either way you have to peel the potatoes and grate them to start with.  Put some salt and freshly milled black pepper in the grated potatoes and mix well.
Take a large non-stick pan, preferable with a lid.  Put some oil in it and put it over medium-high heat.  When it's hot enough, add the grated potatoes in.  With the help of a spatula flatten the top so it looks like a big potato pancake.  Close the lid and leave it to cook for few minutes.  Check the bottom frequently to make sure it's not burnt.  If you are making it from raw potatoes, stir it once in a while so that it's cooked better and fried bits from the bottom are mixed in.  This way you can get it to be more crispy.  You can use the same method also if you are making it from cooked potatoes.  Just make sure you flatten the top eventually and leave the bottom last time to brown nicely.  Once the it is brown underneath, you need to turn it upside down to cook both sides equally.  I use the lid to do that so the form (potato pancake) stays the same.  Just make sure you don't burn your hands.  When it's brown on both sides then it's done. You can use round rings or large cookie cutters to cut out shapes or slice it like a cake to serve. 

Enjoy!

Sunday, January 9, 2011

Pear Tart


Happy New Year to everyone! I hope you all had a good start to 2011.
Do you have some recipes that you cook every now and then? I have a few and I have already written some of those on this blog.  This is another one that I make very often.  It's a Swiss recipe and I learned this from my husband.  It's one of those easy dishes, where you can easily substitute the ingredients if you don't have everything listed.  If you buy the ready puff pastry as well or a ready tart base, then the dish becomes super practical.  You can also make this tart with apples, plums, apricots, different berries, etc.  Quark and yogurt can be replaced with cream or with each other, you can just use only yogurt or just quark.
This tart just taste delicious because it is a very light dessert. It shouldn't be too sweet but depending on the type of fruit you use, you may want to add another tablespoon of sugar to the filling if you'd like. 

(Makes 8 portions)


1 round fresh puff pastry (33cm - app 13'')
2 tablespoons of grounded hazelnuts

Filling:
4 tablespoons of Yogurt
1 cup of milk
3 tablespoons of Quark
2+1 tablespoons of sugar
1 teaspoon vanilla sugar
2 tablespoons of flour
4 medium sized pears
1 egg

Start by putting your pastry in a tart tin, preferably over a baking sheet.  With the help of a fork make few holes on the pastry.  Spread the grounded nuts over the pastry and leave it aside. 
To prepare your filling,  mix the quark, yogurt, milk, 2 tablespoons of sugar, vanilla sugar, flour and 1 egg in a bowl by using a whisker.  
Pour the filling in the tart base you have prepared before. 
Peel the pears, take the seeds out and slice them into 1/2 cm pieces. Arrange the pear slices over the filling. They will be a little bit dipped into the filling but that's alright. You can also spread them randomly over the filling if you prefer.  
Sprinkle the left over tablespoon of sugar over the pear slices.  Bake the tart in preheated oven 180° C(356° F) for 40-45 minutes until the crust is golden brown. 

Thursday, December 9, 2010

Spitzbuben


I have never been much of a baker.  Especially when it comes to cakes.  Fortunately, my friend V has gave me a cake book few years ago as a gift, which improved my baking skills very much.  I still fail to bake a nice looking cake sometimes, although according to my husband they all taste good.  I have been baking some Christmas cookies around this time last few years.  There is no risk of messing them up too bad so I love baking them.  While looking for the recipes of my favorite cookies, and believe me there are quite a few, I decided to write this one.  It absolutely tastes the best with the butter and the jam.  It's really a shame to bake them only at this time of the year but given the amount of butter in them, maybe that's a good cycle. 

(Makes about 40-50 pieces with 4-5 cm diameter cookie cutters)

250 g Butter (about 1 1/4 cups) - softened
125 g powder sugar (about 1/2 cup)
pinch of salt
1/2 tablespoon of vanille sugar
1 egg white (lightly beaten)
350 g white flour (a little less than 3 cups)

For filling:
3-4 tablespoons of quince jelly or any other jam, jelly or marmalade you prefer.

To sprinkle:
2 tablespoons of powdered sugar

Here are the steps:
1.  Start with mixing the softened butter and sugar in a bowl. 
2.  Stir vanille sugar, a pinch of salt and the egg white into the mix.
3. Mix in the flour to the dough. 
4. When the dough is formed, wrap it up with a folio and put it into the fridge to chill for 1 hour. 
5. Take the dough out of the fridge 30 minutes before you start rolling it out.
6. Preheat the oven to 180°C (350°F).
7. Roll out the dough to 2mm (a bit less than 0.1 inch) and cut out shapes with cookie cutters. 
8. Cut out shapes with cookie cutters.  Make sure you have 2 of each shape. 
9. By using a miniature cookie cutter make a shape in the middle of the cookies you'll put on top. 
10. Place the cookies on a baking sheets and bake in the middle rack for about 6-8 minutes.  
11. After they are done, leave them on the baking sheets for about 1-2 minutes to cool down and then transfer them on a wire rack to cool completely.  I normally leave them to cool over the night. 
12. To assemble the cookies, put some some jelly on the bottom half with the help of a teaspoon, then place the top part over.  Try not to put too much jelly, otherwise it will look a little messy.  You can also melt the jelly in a pan before you do this.  I normally just do it without but a lot of recipes call for melting the jelly before making the little sandwich.
13. Sprinkle some powder sugar over the cookies.  

These cookies can be stored in an airtight cookie tin or a jar and they are best when eaten fresh. 

Tuesday, April 27, 2010

Swiss Sunday Bread from Spelt flour - Zopf

Sometimes I'm not really sure if there is more varieties of cheese in Switzerland or more varieties of bread.  Just like it is with all different kinds of cheese, every Swiss canton has its own traditional bread.  Zopf is a very traditional one and it's quite unique.  Zopf means braid as in the shape of this bread.  It has a very special buttery taste and it's mainly preferred for Swiss Sunday breakfasts.  I prefer this bread sometimes to the other breads, because it lasts longer and with all the butter, it stays softer.  I bought a bread machine about 5 years ago.  Yes, I have just said I live in the bread country, but sometimes it's nice to make fresh loaf at home.  It was the best kitchen appliance I have ever bought and it was certainly the most used kitchen appliance I have.  Especially in the last couple of years, as I've been finding it difficult sometimes to get out of the house with my two little children, I used my bread machine a lot more than I used to.  I've also started trying different shapes of breads, because we all know a loaf can be boring sometimes.  Then I use the machine only to prepare the dough.  For this bread I have also made the dough in the bread machine.  If you don't have one then basically follow the instructions for normal dough.   I used spelt flour for this version, which is not the traditional zopf bread, but it tastes great.  I made the same bread again couple of days later to use the left over flour, but sprinkled some sesame seeds over it to give it a slightly different taste.  I also took out the egg that is normally used in the traditional dough, because I believe this way the bread is softer and lasts a bit longer.  I only used one egg to brush the bread over with.


500 g spelt flour
270 ml milk - at room temperature (If you don't want to use milk, you can also use water to replace.)
50 g butter - at room temperature
15 mg of dry yeast
1/2 teaspoon sugar
1 teaspoon salt

1 egg - beaten - to brush the dough
1 tablespoon sesame seeds (optional)


If you are using a machine, put the first 6 ingredients and start making the dough.  If you're kneading it by hand, make sure that your ingredients are not too cold.  Ideally they should be at room temperature, otherwise you'll have to wait longer for your dough to rise.  For hand kneading, mix all your ingredients well and knead a dough until it's all smooth.  Leave your dough covered with a clean kitchen towel in a warm place for about 1 to 1,5 hour until it's doubled in size. 
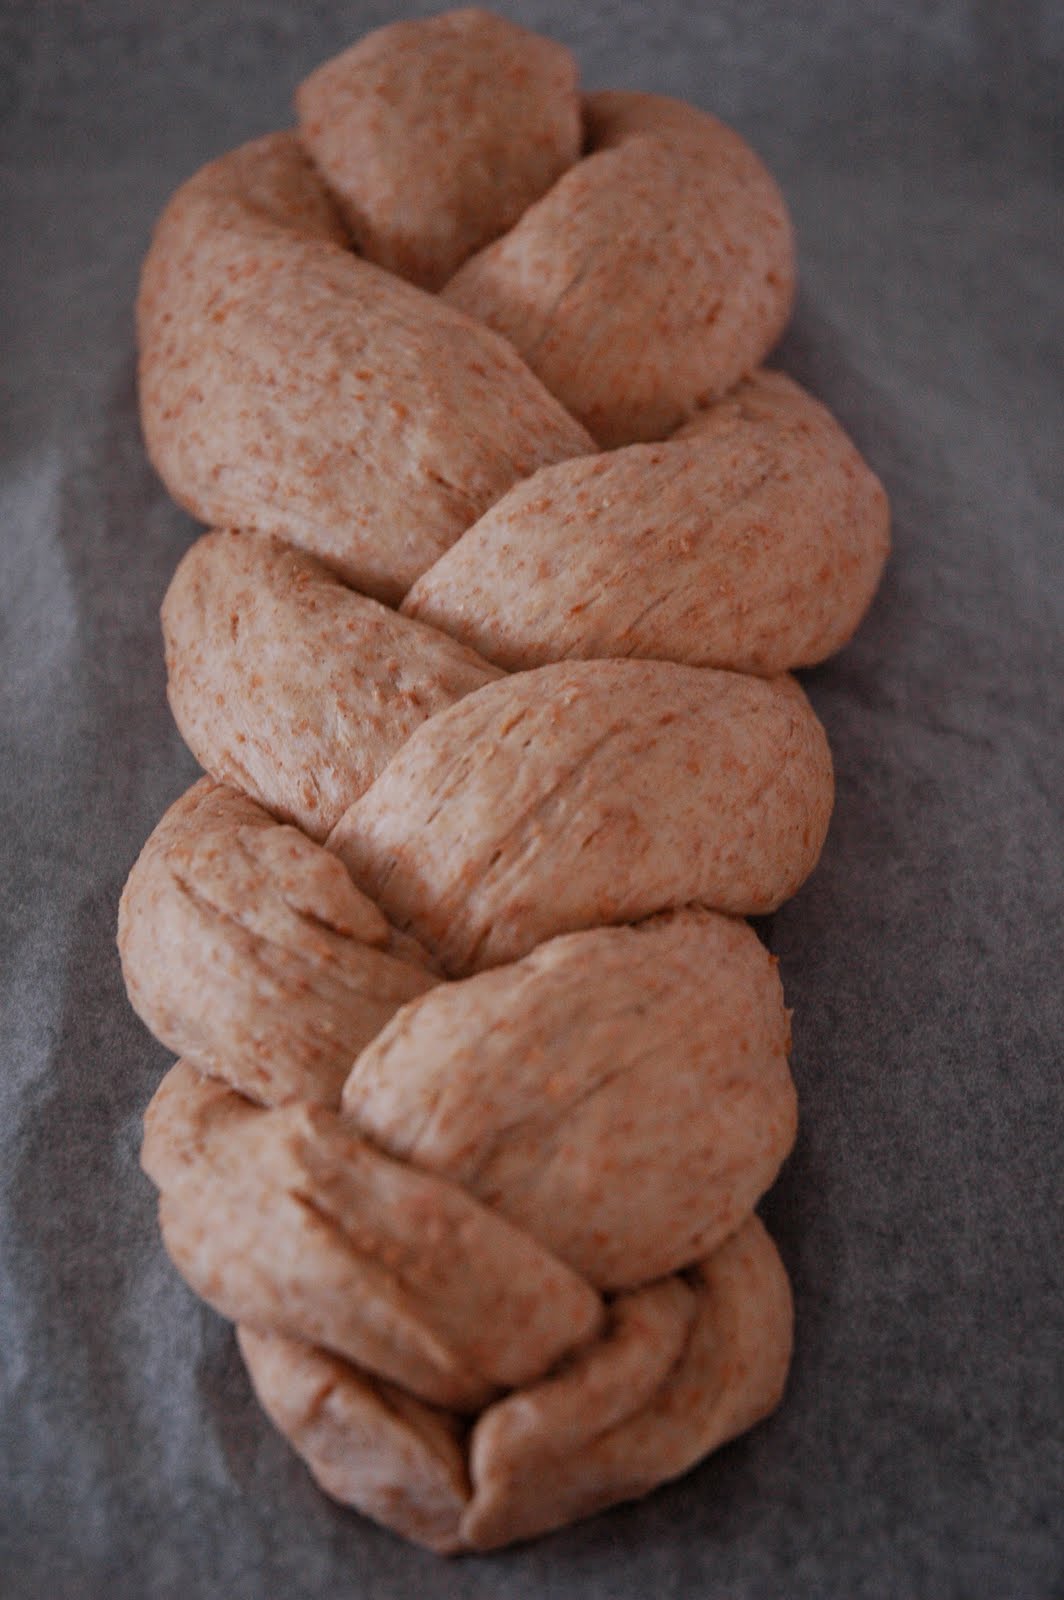
When it's ready, preheat your oven to 180° C(356° F) degrees and get ready to braid your bread.  Divide the dough into two pieces, where one piece is double size of the other one.  Then form one long and one short rolls from the dough.  Put the longer one on a baking sheet shaped like a "U" and put the short roll in the middle of that "U". (See picture)  This will give you three rolls where you can form your braid.  Your braid should look like the second picture in the end.  Once ready, brush it over with the beaten egg and sprinkle sesame seeds if you'd like.  Bake it in your preheated oven for about 35-40 minutes.  When it is done, leave it to cool at least for about 15-20 minutes before any attempt to slice it with a knife.  Spread some butter on your lovely freshly baked Zopf slice and enjoy your breakfast!

Sunday, April 11, 2010

Easy Flammkuchen


Flammkuchen (French call it tarte flambée) is actually something I have had first time in Switzerland, so it has been a Swiss dish for me from the start.  I never tried it in France or Germany.  It's basically like a very thin pizza, but it feels much lighter to eat than a pizza.  This version I made is an easy version because I used a ready puff pastry, not even a usual pizza base or a dough.  If you want to make the dough yourself, there are few different recipes out there, however I hardly recommend to make this version with puff pastry because it's delicious.  I got this idea of using puff pastry from my dear neighbour R. and I made it many times since.  The real taste of flammkuchen is not just its dough, but the crème fraiche (sour cream) that is spread to the base of it.  The original version has some bacon and onions on top, however you can replace the meat with other kinds or try to put leeks instead of the onions.  I have tried several versions of this and it tasted good each time.
I cooked this one last weekend, because my daughter wanted to eat pizza for lunch and she was very hungry.  I only had some ready puff pastry in the fridge, so I decided to make a quick flammkuchen with minced beef.

I made only one flammkuchen but if you want to feed 2 adults, then double the recipe below.

1 round puff pastry (33cm - app. 13'')
100 g créme fraiche (about 1/2 cup)
150 - 200 g minced beef ( about 1 cup)
1/2 of a medium tomato - diced
1 small onion - chopped
1 tablespoon of chopped parsley
Salt and pepper

Start with preheating your oven to 180° C(356° F).  Put the pastry on your baking tray and make holes on the pastry by using a fork.  You need to do this in order to prevent the dough to rise too much.  Then spread the crème fraiche over the pastry and put your onions, meat and tomatoes.  I don't recommend to put too much tomato on it, because it will make the pastry too juicy and then the flammkuchen won't be crispy enough.  Last step is to sprinkle the parsley on top and season with some salt and freshly milled black pepper.  Put it in the oven for about 15-18 minutes until the pastry is looking nice golden brown color.  Serve it warm.  Enjoy!