Search This Blog

Pages

Showing posts with label breakfast. Show all posts

Wednesday, April 13, 2011

Rhubarb and Strawberry Jam


It's a classic for a lot of people but not for me.  I haven't met rhubarb until few years ago.  It was one of those strange vegetables ( yeah that's what I thought) in a new country.  Then it all started with a rhubarb tart, that I found delicious.  It was the smell of rhubarb that was appealing to me.  I didn't know what else I could do with this newly found taste other than the tarts.  Couple of years ago, when I was going through a "I want to make everything at home" stage, where I decided to make some jam.  This phase didn't last very long at the time. You can guess why.  But this year, the spring came early and I've been buying way too many strawberries.  Then I have received a cooking magazine for the spring season and there it was. Rhubarb and strawberry jam.  I thought why not. How hard could it be? I didn't realize that it would take an hour preparation and several hours of stirring and cooking, etc.  In the end was it worth it? I would say yes, but I don't think I would be doing it again any time soon. 
So here are some nice pictures and the recipe. Enjoy!


Rhubarb and Strawberry Jam
(Makes about 2 Lt)
about 700g Rhubarb - Peeled and chopped in 1 cm pieces (see picture)
about 900g Strawberries - Peeled and diced (see picture)
about 1000g sugar
2 tablespoons of lemon juice
1/2 pack of vanilla sugar
400 ml water

Mix all your ingredients except the water in a large bowl. Put them in a large pan and add the water.
Bring it to boil while stirring frequently.  Reduce the heat and leave it to boil until it gets to the jam stage.  Stir it and check frequently.  Now here is what I learned, in order to check the jam stage, you can either take a spoon full of jam and put it on a cold plate, put it in the fridge for few minutes to see if there is gelling.  Until that occurs you need to keep it on the heat, but don't forget to stir.
When it's ready pour it into jars and seal immediately (something new that I learned - I would have left them open to cool down).  It seems that if you store them in a cool and dark place they may last for about a year.  I will test that and get back to you.

Friday, May 7, 2010

Vanilla and Cinnamon Waffles

I remember where I ate my first waffle ever.  It was in Istanbul, in Bebek.  I am not sure if the place still exists but they used to make the world's best chocolate and banana waffles.  At least for me it was the best.  My cousin introduced me to that place at the time and I'm so happy that she did, because I have never forgotten those delicious waffles and their lovely smell.  That was long long time ago, and I have eaten many waffles since, but I guess none of them were that good.  Few months ago I was in search for a toaster, which can also make waffles and I found what I was looking for.  I have made waffles only twice since I bought it.  This recipe came out in the second trial and they were very good, so I wanted to share.  If you have a waffle maker then try this recipe. The waffles turn out so good, you can even eat them without putting anything on them.  This recipe made about 10 waffles for me.


2 cups of flour
2 cups of milk
2 tablespoons of sugar
1/2 tablespoon of vanilla sugar
2 teaspoons of baking powder
1/2 teaspoon of cinnamon (use cinnamon that is freshly grounded, it still has to have some lovely cinnamon smell)
1/2 teaspoon of lemon zest
3/4 teaspoon of salt
2 tablespoon of butter (melted)
2 eggs

Start with whisking the eggs and the sugar in a bowl.  Add the milk, melted butter, lemon zest and vanilla sugar to this mixture.  In a separate bowl, mix the rest of the ingredients, flour, baking powder, cinnamon and salt.  Once the dry ingredients are mixed well enough, combine the two mixtures and whisk all together.  Use a ladle to put the mixture into your preheated waffle maker.  Try not to put too much, otherwise it will overflow.  Bake them until they have a nice golden brown color.  I put some maple syrup and banana slices on mine and sprinkled a little bit of icing sugar.  Next time I will be trying them with chocolate and bananas. 

Tuesday, April 27, 2010

Swiss Sunday Bread from Spelt flour - Zopf

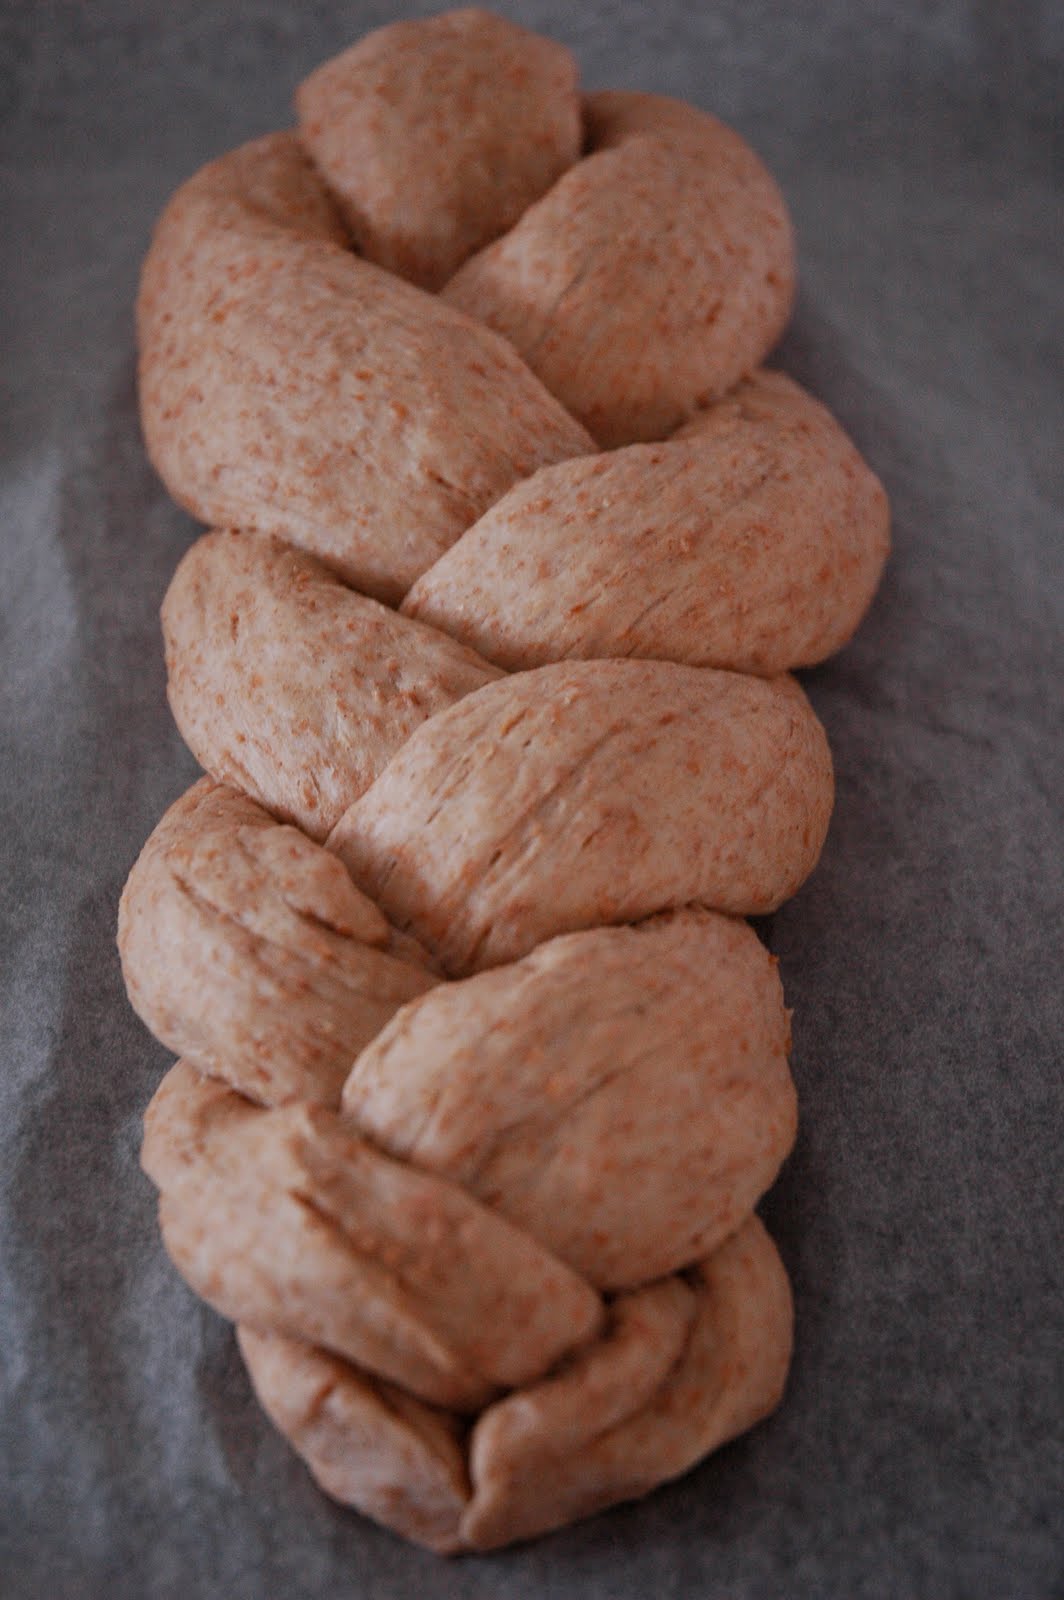
Sometimes I'm not really sure if there is more varieties of cheese in Switzerland or more varieties of bread.  Just like it is with all different kinds of cheese, every Swiss canton has its own traditional bread.  Zopf is a very traditional one and it's quite unique.  Zopf means braid as in the shape of this bread.  It has a very special buttery taste and it's mainly preferred for Swiss Sunday breakfasts.  I prefer this bread sometimes to the other breads, because it lasts longer and with all the butter, it stays softer.  I bought a bread machine about 5 years ago.  Yes, I have just said I live in the bread country, but sometimes it's nice to make fresh loaf at home.  It was the best kitchen appliance I have ever bought and it was certainly the most used kitchen appliance I have.  Especially in the last couple of years, as I've been finding it difficult sometimes to get out of the house with my two little children, I used my bread machine a lot more than I used to.  I've also started trying different shapes of breads, because we all know a loaf can be boring sometimes.  Then I use the machine only to prepare the dough.  For this bread I have also made the dough in the bread machine.  If you don't have one then basically follow the instructions for normal dough.   I used spelt flour for this version, which is not the traditional zopf bread, but it tastes great.  I made the same bread again couple of days later to use the left over flour, but sprinkled some sesame seeds over it to give it a slightly different taste.  I also took out the egg that is normally used in the traditional dough, because I believe this way the bread is softer and lasts a bit longer.  I only used one egg to brush the bread over with.


500 g spelt flour
270 ml milk - at room temperature (If you don't want to use milk, you can also use water to replace.)
50 g butter - at room temperature
15 mg of dry yeast
1/2 teaspoon sugar
1 teaspoon salt

1 egg - beaten - to brush the dough
1 tablespoon sesame seeds (optional)


If you are using a machine, put the first 6 ingredients and start making the dough.  If you're kneading it by hand, make sure that your ingredients are not too cold.  Ideally they should be at room temperature, otherwise you'll have to wait longer for your dough to rise.  For hand kneading, mix all your ingredients well and knead a dough until it's all smooth.  Leave your dough covered with a clean kitchen towel in a warm place for about 1 to 1,5 hour until it's doubled in size. 
When it's ready, preheat your oven to 180° C(356° F) degrees and get ready to braid your bread.  Divide the dough into two pieces, where one piece is double size of the other one.  Then form one long and one short rolls from the dough.  Put the longer one on a baking sheet shaped like a "U" and put the short roll in the middle of that "U". (See picture)  This will give you three rolls where you can form your braid.  Your braid should look like the second picture in the end.  Once ready, brush it over with the beaten egg and sprinkle sesame seeds if you'd like.  Bake it in your preheated oven for about 35-40 minutes.  When it is done, leave it to cool at least for about 15-20 minutes before any attempt to slice it with a knife.  Spread some butter on your lovely freshly baked Zopf slice and enjoy your breakfast!

Friday, April 23, 2010

Chocolate Rolls


I can't believe I never thought of this before.  It's the combination of chocolate and yufka, which is the Turkish phyllo pastry for making börek.  I love chocolate, as you can probably tell by now.  I always have some cooking chocolate in my kitchen somewhere, if I haven't eat them at some point.  The phyllo pastry is something, I could never find in the supermarkets here in Switzerland, until few years ago.  I used to buy them once in a while from a Turkish food shop or in some gourmet stores in Zurich.  In the last few years, they started showing up in the big supermarkets first and now I can find them almost in any food stores.  However, I still think like that I find gold when I see them, so I generally end up buying 3-4 packs and then put them in the freezer at home.  If I want to make a börek, I just take the pastry out of the freezer couple of hours before I have to prepare (until now I didn't attempt to make baklava as it seemed too complicated but I will for sure let you know about my experiences if I do).  This came up only because I took out two packs of pastry out of my freezer, but then decided two of them will be too much to make a börek so I made this.  It's the idea of the cigarette börek (a famous Turkish recipe), but instead of cheese, I put chocolate and some other things.  I wasn't sure what to call it.  Chocolate heaven, chocolate baklava, chocolate börek... chocolate rolls was the winner in the end. These things are super delicious.  Believe me, you won't regret it if you try them.


(Makes 25) 

8 Turkish (or Greek) phyllo pastry (Yufka) - The sizes of these pastries are generally different everywhere.  I used 20x30cm rectangular ones and cut them into triangle shapes (see photo below).  In some shops you can even find triangle shaped ones in packs. 
200 g dark chocolate (70% cocoa solids)
115 ml half fat cream (1/2 cup)
2 tablespoons of coconut flakes
2 tablespoons of crushed almonds
1 teaspoon of vanilla sugar
50 g butter
1 tablespoon of milk
1 tablespoon of water


Put the cream in a sauce pan and bring it to boil over medium heat.  Take the cream off the heat once it's boiling.  Break your chocolate into little pieces and stir them into the hot cream to melt.  Add the coconut flakes, crushed almonds and vanilla sugar to the chocolate-cream mixture, then set it aside.  Melt the butter in a separate pan and add the milk and water in it after it's melted.  Prepare your pastries in triangles as in the picture above.  Once your pastry is ready, brush the melted butter mixture all over the pastry.  Put a tablespoon of the chocolate mixture on the long side of the pastry as pictured above and spread it a little bit.  First fold the ends from outside to the inside, so that the chocolate will not leak outside when you roll it.  After that, roll the pastry up.  Place the rolled pastry on a baking sheet and brush it over with the butter mixture.  This will give them a golden color once they are baked.  Repeat the same until you use all the pastry.  Bake them in a preheated oven at 180° C(356° F) for about 15 minutes.  Once they are done leave them to cool for a while.  I found them more delicious after they were really cooled down.  Enjoy your chocolate treat.

Thursday, April 1, 2010

Crepe with Mango and Apples

Although it was really difficult for me to understand at the beginning, at some point in the last 5 years, I learned how not to make a big meal for dinner.  Of course this is only valid during the week.  Weekends, on the other hand,  are a different story.  In my culture (the Mediterranean culture in general) dinner is a big deal.  Dinner is when we are really eating something good and enjoying a real meal with our family.  Where I live now, it seems that generally lunch is more important than dinner.  At least in the families I know of.   Now I got used to eating leftovers from lunch or some cheese and bread for dinner.  It's probably healthier anyway, but sometimes, I really don't feel like eating leftovers or even cheese, although I love cheese. Then I cook something light.  In the winter, a nice soup is normally what I go for, but yesterday I thought the winter was over, so I felt like making crepes or pancakes for dinner.  The kids love it and so do I.  I made this one with half spelt flour and half whole wheat flour because that was all I had.  It was a very healthy meal if you exclude the butter bit of course.  You can combine it with different fruits.  I used some mango and apples then I put some maple syrup on top to sweeten it.  Here I have given the amounts I have used,  but depending on the kind of flour or milk you use, your mixture can have a slightly different density than mine had, therefore I have given some tips below for this.
With the upcoming long weekend, this is a good option for breakfast or brunch.  Enjoy!


(makes about 5 medium size crepes)

3 tablespoons of spelt flour
3 tablespoons of whole wheat flour
2 eggs
2 cups of milk (makes a little bit more than 400 ml)
1/2 teaspoon of salt
1/2 teaspoon of sugar
1/4 teaspoon of nutmeg
A pinch of cinnamon
Butter or oil to cook
For serving:
1/2 mango peeled and chopped
1 apple peeled and chopped
Maple syrup

Make your batter by whisking the eggs, flour, milk in a bowl.  Add in salt, sugar, nutmeg and cinnamon and whisk it for another minute or so until your mixture has a creamy texture.  If the batter is too thin, then add some more flour and if it's too thick, then add a little bit more milk and continue to whisk.  When ready, heat up a little bit of butter or oil in a non-stick small pan over medium-high heat.  When it's hot enough put about 1/2 ladle of the mixture in the pan.  This can slightly vary according to the size of the pan you use.  Just make sure the batter covers the surface of the pan.  Cook it for about two minutes until the bottom side is light golden brown.  Turn it over with the help of a spatula and cook the other side.  Serve it hot with the chopped fruits and some maple syrup on top.  Alternatively you can put the fruits and the syrup in it, then fold it before serving.